Hey, new to the forums. I got an SGI Octane2 a while ago and after finally figuring out how to install and get all the desired software working, I finally got to toy with Alias PowerAnimator. I've always been a fan of the Donkey Kong Country games and such as a kid, I really like the aesthetic that early CGI had, and it feels amazing to actually get to touch and use the very software that made it back then. Only issue is while I have quite the skills at modelling in modern software like Blender and ZBrush, antique software like Alias PowerAnimator 9, kind of hard to translate the skills into there. So upon this thread I'm going to post my findings and hopefully some of you can help me figure out what kind of actions I need to do to get myself more comfortable with using PA.
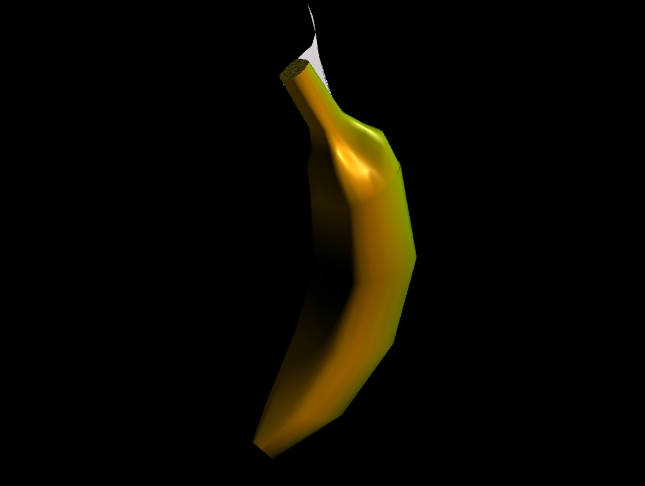
The banana is pretty messy yes, but I was amazed I could even make something like this, so I'll worry about making more polished work later. What I'd really like to have here is a concise and straight to the point guide that can help people translate their modelling skills from modern software into PA. I'm likely to forget since I don't use PA as much and it'd be good to have notes. Plus I feel like from what few tutorial videos I've found, they don't seem to show how to specifically translate existing modeling skills, more like someone showing themselves making a model from start to finish. What I need are fast notes on how to do specific actions.
My findings so far (much of this stands to be corrected or further explained)
Alias PowerAnimator is a really old 3D modelling software that was used to make the prerendered graphics of Donkey Kong Country and other N64 era games.
It’s very clunky to use in comparison to modern software like Blender. Here is my listing of my findings on how to at least somewhat use it.
Files can be transferred to modern systems using an FTP (File Transfer Protocol) I have used Filezilla for that. Make sure the SGi Computer is connected to the internet via an ethernet cable (wi-fi pretty much didn’t exist back then) and open Filezilla. Enter the credentials of the system and you should be able to drag and drop files back and forth.
The following instructions are written in the sense that you are already familiar with the pipeline of making 3D models in modern software like Blender and Maya, so don’t go trying to use ancient 3D modelling software without knowing the basics first! Can’t really teach you how to be artistic, but I can at least show you how to control the old software itself, so you can slowly figure out how to translate your skills into it.
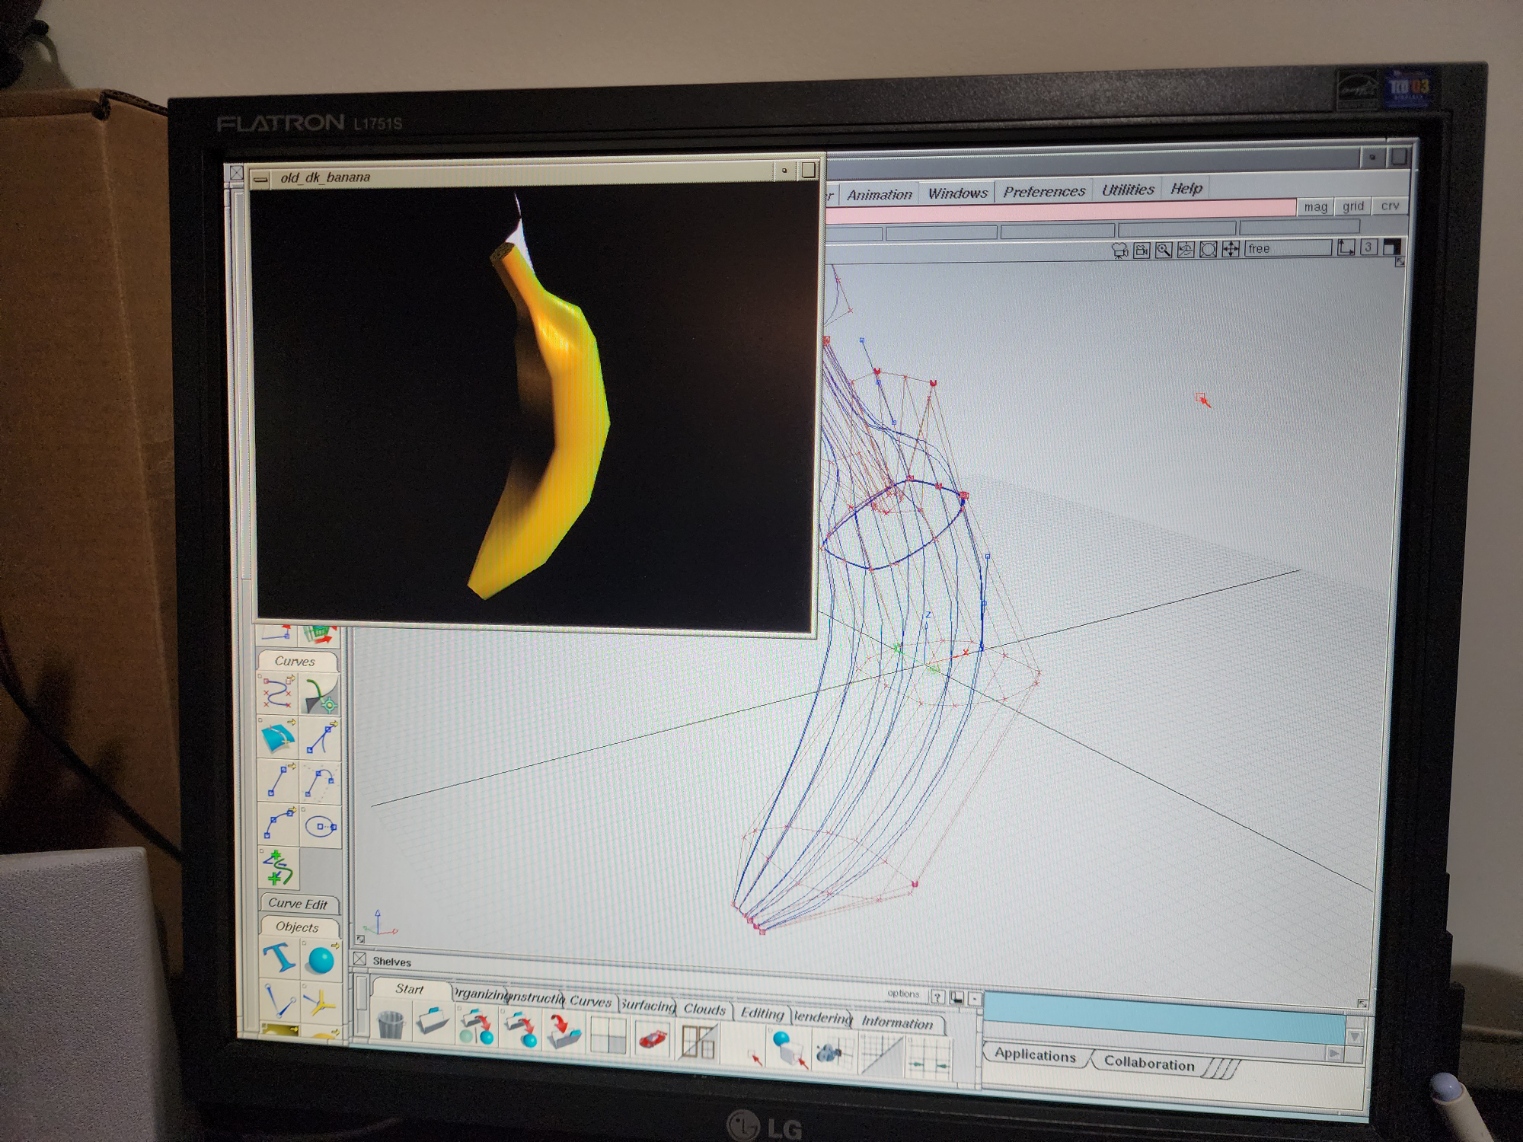
Alias uses a 4 viewport system, Top, Side, Back, and Perspective by default. While most modern software can comfortably be used with a single perspective viewport, you kind of needed the other viewports back then for some precision placement. Just a quicker way instead of constantly cycling through views on the numpad like Blender given PA’s clunkiness. You can click an icon in the upper right corner of a viewport to expand it so it occupies the whole screen. I find moving the camera to be a bit stiff, so this isn’t the most recommended.
Alt + Shift is used to control the camera. Left is for dolly, middle is for pan, and right is for zoom.
Ctrl + Shift then dragging the mouse a bit brings up radial context menus for doing common actions. Left allows you to choose what can be picked, an object, component, control vertices, or… nothing. Middle allows you to switch between move, rotate, and scale. Left is X, middle is Y, and Right is Z axis respectively.
Models like primitives can be put in an edit mode similar to what Blender has by selecting on the top menu bar, ObjectDisplay and then Control.
Within DisplayTgls you can enable Shade, to turn viewport shading on and get out of wireframe view. The old hardware of an SGI computer can’t really keep things shaded in motion so well though in real time, so it’ll flick back to wireframe whilst moving.
Models here are made using NURBS instead of polygons by a technical standpoint, although polygons do exist here too, they are kind of treated differently. Think of NURBS as like any typical model you apply a subdivision surface modifier to.
Extruding can be done using the Extrude action found in the Surfaces tab on the left. You will need to make a line from the Curves tab because PA needs a path to be extruded on set up first. This is cumbersome but that’s the way it was back then.
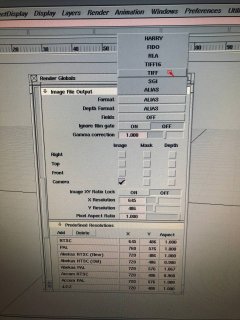
Renders come out as seemingly useless so far SDL files, but it seems to create a separate PIX file which appears in a separate directory (so far /Desktop/Pix) which can be read by XNView. To launch XNView, just type “xnview” in the console and it should appear in a tiny window in the upper left corner. Simply open the PIX file and save it as a JPG, and you should be able to transfer it to a modern system.
To figure out
The following is a list of actions that I have yet to figure out how to perform in PA, they are actions I commonly use in modern software when making models, so I hope I can get some answers on how to do them.
Mirroring
Applying materials, and to specific parts such as faces of a model only
Make a face to seal off seams
Export a model in a format that can be read by modern systems
See if it is possible to get common movement, rotation, and scale gimbals to appear as something like that appears when a primitive is first placed.
Paths for making things like cables, chains, wires etc.
Loop cut
Remove doubles to clean up vertices that occupy the exact same space.
Merge CVs or vertices
Proportional editing (don’t know if this existed back then)
Fur particles
Join meshes and objects together to be counted as a single object
Cameras that you can place and jump to the view of
The banana is pretty messy yes, but I was amazed I could even make something like this, so I'll worry about making more polished work later. What I'd really like to have here is a concise and straight to the point guide that can help people translate their modelling skills from modern software into PA. I'm likely to forget since I don't use PA as much and it'd be good to have notes. Plus I feel like from what few tutorial videos I've found, they don't seem to show how to specifically translate existing modeling skills, more like someone showing themselves making a model from start to finish. What I need are fast notes on how to do specific actions.
My findings so far (much of this stands to be corrected or further explained)
Alias PowerAnimator is a really old 3D modelling software that was used to make the prerendered graphics of Donkey Kong Country and other N64 era games.
It’s very clunky to use in comparison to modern software like Blender. Here is my listing of my findings on how to at least somewhat use it.
Files can be transferred to modern systems using an FTP (File Transfer Protocol) I have used Filezilla for that. Make sure the SGi Computer is connected to the internet via an ethernet cable (wi-fi pretty much didn’t exist back then) and open Filezilla. Enter the credentials of the system and you should be able to drag and drop files back and forth.
The following instructions are written in the sense that you are already familiar with the pipeline of making 3D models in modern software like Blender and Maya, so don’t go trying to use ancient 3D modelling software without knowing the basics first! Can’t really teach you how to be artistic, but I can at least show you how to control the old software itself, so you can slowly figure out how to translate your skills into it.
Alias uses a 4 viewport system, Top, Side, Back, and Perspective by default. While most modern software can comfortably be used with a single perspective viewport, you kind of needed the other viewports back then for some precision placement. Just a quicker way instead of constantly cycling through views on the numpad like Blender given PA’s clunkiness. You can click an icon in the upper right corner of a viewport to expand it so it occupies the whole screen. I find moving the camera to be a bit stiff, so this isn’t the most recommended.
Alt + Shift is used to control the camera. Left is for dolly, middle is for pan, and right is for zoom.
Ctrl + Shift then dragging the mouse a bit brings up radial context menus for doing common actions. Left allows you to choose what can be picked, an object, component, control vertices, or… nothing. Middle allows you to switch between move, rotate, and scale. Left is X, middle is Y, and Right is Z axis respectively.
Models like primitives can be put in an edit mode similar to what Blender has by selecting on the top menu bar, ObjectDisplay and then Control.
Within DisplayTgls you can enable Shade, to turn viewport shading on and get out of wireframe view. The old hardware of an SGI computer can’t really keep things shaded in motion so well though in real time, so it’ll flick back to wireframe whilst moving.
Models here are made using NURBS instead of polygons by a technical standpoint, although polygons do exist here too, they are kind of treated differently. Think of NURBS as like any typical model you apply a subdivision surface modifier to.
Extruding can be done using the Extrude action found in the Surfaces tab on the left. You will need to make a line from the Curves tab because PA needs a path to be extruded on set up first. This is cumbersome but that’s the way it was back then.
Renders come out as seemingly useless so far SDL files, but it seems to create a separate PIX file which appears in a separate directory (so far /Desktop/Pix) which can be read by XNView. To launch XNView, just type “xnview” in the console and it should appear in a tiny window in the upper left corner. Simply open the PIX file and save it as a JPG, and you should be able to transfer it to a modern system.
To figure out
The following is a list of actions that I have yet to figure out how to perform in PA, they are actions I commonly use in modern software when making models, so I hope I can get some answers on how to do them.
Mirroring
Applying materials, and to specific parts such as faces of a model only
Make a face to seal off seams
Export a model in a format that can be read by modern systems
See if it is possible to get common movement, rotation, and scale gimbals to appear as something like that appears when a primitive is first placed.
Paths for making things like cables, chains, wires etc.
Loop cut
Remove doubles to clean up vertices that occupy the exact same space.
Merge CVs or vertices
Proportional editing (don’t know if this existed back then)
Fur particles
Join meshes and objects together to be counted as a single object
Cameras that you can place and jump to the view of