Power Bay Pinout ?

lohmos

New member
Oct 19, 2022
17
8
3
Germany Trier
Wanna use an r-brick for numalinking my 4 o350.
There is only that DC connector for that o3000 powerbay.
Anyone out there who can gimme that pinout ?
There are 3 rows with 7 pins = 21 on that r-brick
 

Elf

Storybook / Retired, ex-staff
Feb 4, 2019
792
252
63
Mountain West (US)
Unfortunately I don't have (and haven't seen) pinouts for these yet but often if you open them up you can tell based on wire colors what groups of pins are tied together. Then the number of things to measure or test can be greatly reduced.
 

pierocks

New member
Mar 2, 2021
18
13
3
Between my very hazy memory and some quick searching, the power bay only supplies 12v to supply the L1 controller (dunno if this is even present on R bricks, never had one for my O3200), and 48v. Should be relatively easy to figure out from that if you have a multimeter that does continuity. Ground pins will be continuous with the chassis. As Elf mentioned, other pins should be connected in groups, so after you map out ground, start checking for continuity between the remaining pins. Most of the rest should be connected, and there’s your 48v. Any others will be 12v.

Additional info that probably doesn’t help immediately…there was a special R-Brick for O300/O350 systems that has a built in power supply since those machines don’t run on 48v DC like O3k bricks do.
 
  • Like
Reactions: Elf

pierocks

New member
Mar 2, 2021
18
13
3
I take it all back! Well, some of it anyway. I think the R-Brick does have an L1 controller, so there will also be one or more pins dedicated to signaling the power bay to turn on the 48v rails for that brick.


Simply shoving voltage into the R-Brick may or may not be enough to make it go…ymmv, safety not guaranteed, etc.
 
  • Like
Reactions: Elf

pierocks

New member
Mar 2, 2021
18
13
3
I've been thinking about this more...any chance you could open up your R-Brick and get some pictures of the circuit board that the DC power connector feeds? Way back when I figured out how to convert an X-Brick into a poor man's V-Brick, I had to convert the 48v DC that the brick was supplied with down to the 24v DC that VPro graphics boards need (which, AFAIK, no other XIO boards require). This lack of 24v supply is what was keeping VPro boards working in a stock X-Brick. I have a hunch that the DC-IN board is probably similar, if not identical, to the one in the X-Brick, and if that's the case, there's may be an unused molex connector on that board that connects to the 48V and GND lines. I used this molex connector to plug in a 48v->24v DC-DC converter, which allowed me to power the V6 I put into my X-Brick. That would go a long way to figuring out which pins are 48v...
 
  • Like
  • Love
Reactions: Elf and chulofiasco

lohmos

New member
Oct 19, 2022
17
8
3
Germany Trier
Ok, got that r-brick yesterday after a looong journey to europe.

I will open it the next days and look inside and post some photos or the pinout.

Anyone out there who has two Numalink Cables and is about to sell ?

S/N 21841081-277

SGI 018-1110-001 B
 
  • Like
Reactions: Elf

pierocks

New member
Mar 2, 2021
18
13
3
Man I miss Nekochan...

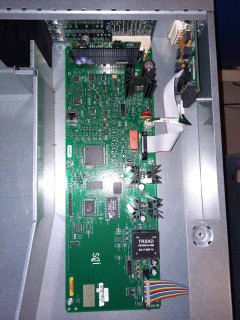
That small white power connector is the one I used to pull 48v for my X-Brick to V-Brick mod. I'm sure Nekochan had photos. It'll be a miracle if I can find the photos I took 13-14 years ago. They are probably somewhere on my NAS, but I've been insanely bad about organizing them.

After thinking about it while I fruitlessly searched the wayback machine...I have a strategy for you. First, see the docs here, specifically the " Switch, Connectors, and LEDs on R–brick Rear Panel" section. Get out your multimeter and put it into continuity mode. Put one probe on to the bare metal chassis and use the other probe on each of the three pins on the big black connector or small white connector. Both connectors should have one pin each connected to GND, 12V, and 48V. When you find continuity with the chassis, that's obviously your ground.

Next, the power switch on the back turns the L1 off/on. From the sounds of it, the L1 runs off of 12V from the power bay. Therefore, that switch must control the 12V line. Make sure the switch is on and pick either of the two wires connecting the switch to the power board. Put one probe there, and test the remaining two pins on the internal power connector. That'll be your 12V line.

The last line should be 48V.

When you have those three things figured out, you can start probing the connector on the back. Again, leave the power switch in the on position so you maintain continuity from the rear connector to the internal connectors. There should be several pins on the external connector that you don't care about because they carry data signals back to the power bay. What's left will be the GND, 12V, and 48V pins. As a sanity check, there should be quite a few more GND and 48V pins than 12V pins.
 
  • Like
Reactions: Elf

lohmos

New member
Oct 19, 2022
17
8
3
Germany Trier
Thats what i get by measuring

In the midde the lonley plus (4-A) (marked as star and goes to the green cable) seems to be the 12 V Lane for me as right above the pin (5-C) marked with "S" goes to the LED marked with 12 V.

There is an second plug on that board maybe used for bigger ampere rates on other bricks. Hope there i can find out the pin output
 

Attachments

  • Like
Reactions: Elf

About us

  • Silicon Graphics User Group (SGUG) is a community for users, developers, and admirers of Silicon Graphics (SGI) products. We aim to be a friendly hobbyist community for discussing all aspects of SGIs, including use, software development, the IRIX Operating System, and troubleshooting, as well as facilitating hardware exchange.

User Menu